
| Cropping an Image | ||
|
This example shows how to draw a cropped image from a file. In this instance we're going to discard a 20 pixel border round the edge of the image.
|
| 1 | |
| Setting Up | ||
|
We start by setting up variables we will use later - the path to the source file and the path to the output file. [VBScript]
|
| 2 | |
| Creating the Objects | ||
|
We will need a few objects so we create them all here for convenience. [VBScript]
|
| 3 | |
| Finding the Portion of the Image to Draw | ||
|
We need to find the portion of the image we want to draw. To do this we get the natural Rectangle of the main image using the Graphic object. We then inset the Rectangle by 20 pixels on each side. [VBScript]
|
| 4 | |
| Drawing the Image | ||
|
The default size of the Canvas is the natural, un-cropped size of the first image drawn on it. We are going to crop the image so we have to manually set the Canvas size to take this into account. We also use the Pos parameter to shift the image up and left to cater for our border width. [VBScript]
|
| 5 | |
| Saving | ||
|
Finally we save the picture as a JPEG image. [VBScript]
|
| 6 | |
| Input and Output | ||
|
Sample input and output images are shown below.
|
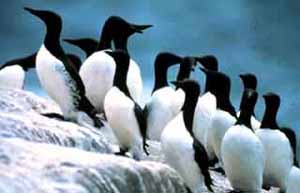 birds.jpg
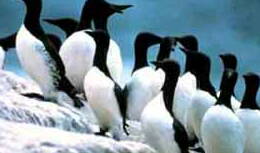 croppedbirds.jpg